
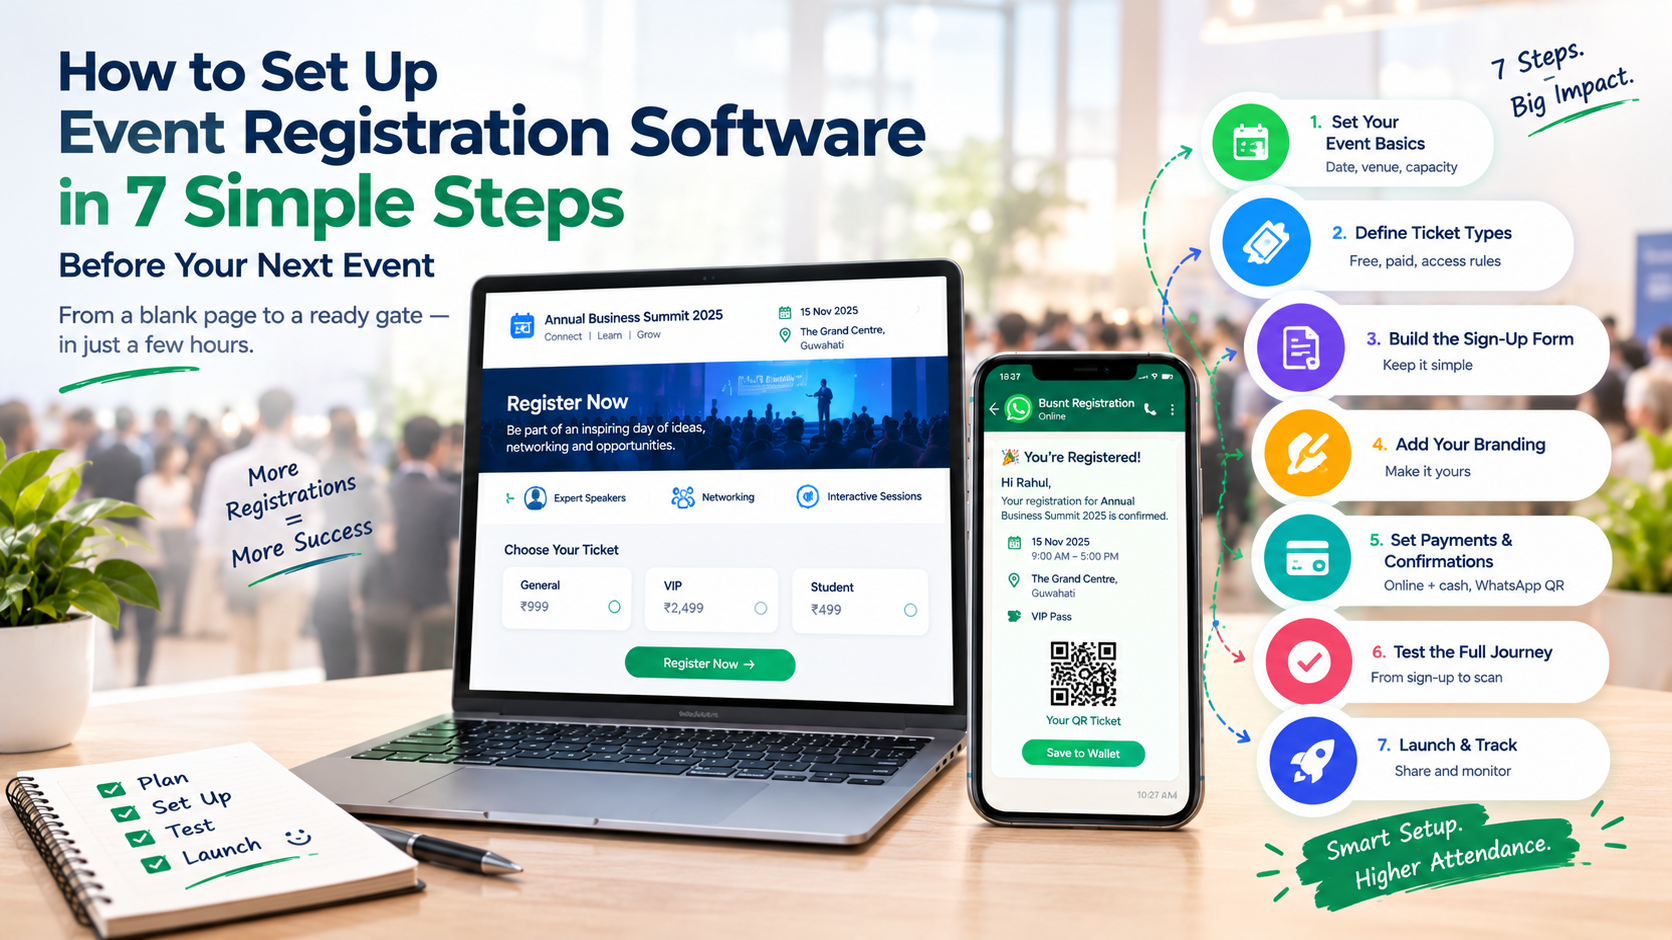
Your event is three weeks away. Registration is not set up, someone suggested “just a Google Form,” and you can already picture the chaos at the gate. Good news: setup is much faster than most organisers expect.
To set up event registration software, define your event details, create your ticket types, build a lean sign-up form, add your branding, set payments and confirmations, test the full journey, and launch with live tracking. Each step is small, and together they take you from a blank page to a ready gate.
Here is the full playbook, with a countdown you can follow.
Quick Summary
- Setup is seven small steps, not one big project.
- Decide your ticket types and access rules before you build anything.
- Collect only the details you will actually use.
- Test the full journey, from sign-up to QR scan, before you share the link.
- AccessEase covers free and paid events, WhatsApp QR delivery, access control and live tracking.
How Do You Set Up Event Registration Software? The 7-Step Overview
Setup follows seven steps: confirm the event basics, define ticket types, design the form, add branding, set payments and confirmations, test everything, then launch and monitor. The timings below are illustrative for a simple event. Larger events with more ticket types take longer.
| Step | What you do | Illustrative time |
| 1 | Lock event basics | 15 minutes |
| 2 | Define ticket types and access | 20 minutes |
| 3 | Design the sign-up form | 20 minutes |
| 4 | Add your branding | 20 minutes |
| 5 | Set payments and confirmations | 30 minutes |
| 6 | Test the full journey | 30 minutes |
| 7 | Launch and watch live numbers | 15 minutes |
That is roughly half a working day for a straightforward event. Which step would take you the longest? For most organisers, it is Step 2, because it forces decisions they have been putting off.
The 7 Steps in Detail
Step 1: Lock your event basics
Before you touch any tool, write down your event name, date, time, venue, expected crowd size and whether the event is free or paid. These details feed every later step. Changing them after launch means confusing guests who have already registered.
Step 2: Define your ticket types and access levels
List who is coming and what each group gets. For example:
- General entry
- VIP or early access
- Student or member pricing
- Passes that include dining or special zones
Good event registration software lets you attach these access rules to the pass itself, so staff never have to decide at the counter.
Step 3: Design a lean sign-up form
Every extra field costs you sign-ups. Ask for what you need, such as name, WhatsApp number and ticket type, and leave the rest. A lean event registration system respects your guest’s time, and it respects your own, since less data means less to clean up later.
Step 4: Add your branding
Your sign-up page is the first thing guests see. Add your logo, colours and a short event description so it feels like your event, not a generic form. Branding the event signup software page also builds trust, which matters most when guests are paying.
Step 5: Set payments and confirmations
Decide how guests pay, and how they will hear back from you. In India, that often means supporting both online payment and cash registration, and confirming on WhatsApp, where guests actually look. A complete event registration solution sends the confirmation and QR code instantly, with no manual replies from you.
Step 6: Test the whole journey
Do not trust the setup screen. Register as a guest yourself, pay, receive the QR code, then scan it on a second phone. Check this on a normal mobile connection, not just office Wi-Fi. Invite a teammate to try it too, since fresh eyes catch confusing wording quickly. Every gap you find now is one fewer problem at the gate.
Step 7: Launch, share and watch the numbers
Share your link where your guests already are: WhatsApp groups, Instagram, email and posters with a QR code. Then watch registrations come in on a live dashboard. If numbers stall, you will know early enough to promote harder. Good event signup software shows you this without exporting a single file.
Want help setting up your first event? Talk to the AccessEase team for a quick walkthrough.
Your setup checklist
- Event name, date, venue and capacity confirmed
- Ticket types and access rules decided
- Form limited to essential fields
- Logo, colours and description added
- Online and cash payment options set
- WhatsApp confirmation with QR code switched on
- Full journey tested on two phones
- Link shared in at least three places
What to Check Before You Choose Event Registration Software
Before choosing event registration software, check that it matches how your guests actually behave. Look at payment options, confirmation channel, access control, live reporting and support. A tool that looks impressive in a demo but ignores these will cost you time on event day.
| Feature | Why it matters | Ask the vendor |
| Free and paid tickets | Covers different event types in one setup | Can I run both without changing tools? |
| WhatsApp QR delivery | Guests actually see it | Is the QR sent automatically? |
| Cash registration | Common in many Indian events | Can staff record cash sign-ups? |
| Access control | Prevents counter disputes | Can dining or VIP rules sit on the pass? |
| Live tracking | Shows turnout as it happens | Is the dashboard real time? |
| Support | Problems happen on event day | Who do I call when I am live? |
How AccessEase Simplifies Every One of These Steps
AccessEase is event registration software designed so that setup does not become a project of its own. Organisers can run free or paid events without changing how they normally work. A small meet-up may need only free sign-ups, while a concert may need several paid ticket categories.
Here is how it maps to the seven steps:
- Steps 1 and 2: set up free or paid events with multiple ticket categories and access rules.
- Steps 3 and 4: a branded registration page that guests find simple to complete.
- Step 5: online and cash registrations, with a unique QR code sent on WhatsApp.
- Step 6: QR scanning at the gate, with access privileges such as dining linked to the code.
- Step 7: real-time analytics for registrations and check-ins.
- Throughout: integrations with your existing tools and a support team to help.
It is a practical event registration solution that grows with your event, from a small workshop to a large ticketed show.
Ready to set up your next event? Visit AccessEase and see how quickly you can go live.
Common Setup Mistakes to Avoid
Common Mistake: Building the form first and deciding ticket types later. Your form, payments and access rules all depend on those decisions.
- Asking for too much. Long forms lose sign-ups.
- Skipping the test run. Always scan a QR code before you share the link.
- Confirming only by email. Many guests never open it, so use WhatsApp.
- No plan for cash guests. Decide how cash sign-ups are recorded before launch.
- Choosing event registration software on price alone. Compare support and check-in speed too.
Conclusion
Setting up registration does not need to take weeks. Seven small steps, from event basics to a live launch, are enough to replace a messy spreadsheet with a smooth process your guests will notice. The key is to decide before you build, test before you share, and choose event registration software that fits how your audience actually signs up and pays. AccessEase brings free and paid sign-ups, WhatsApp QR codes, access control and live tracking into one place. Ready to start step one? Visit AccessEase and book a demo.
Frequently Asked Questions
How long does it take to set up an event registration system?
Setting up an event registration system typically takes a few hours for a simple event, and a day or two for events with several ticket types, payments and access rules. Your decisions take longer than the tool does. AccessEase supports free and paid events, and its team can guide you through setup.
Can event signup software be customized with my branding?
Yes, good event signup software lets you add your logo, colours and event details to the sign-up page. AccessEase offers a branded registration page, so guests see your event identity from the first click instead of a generic form. Confirm exactly what you can customize during a demo.
What information should an event registration solution collect from attendees?
An event registration solution should collect only what you need: name, WhatsApp-enabled phone number, email and ticket type, plus payment details where relevant. Add extras like dining preference only if you will use them. AccessEase sends QR codes on WhatsApp, so a correct phone number is the most important field.